Windows 11 KVM Client Drivers and Tips
Working KVM drives and guest tools.
This walkthrough also apply to Windows 10.
Download Drivers
Get virtio drivers before installing Windows 11 in KVM. As we need the driver iso during the installation process.
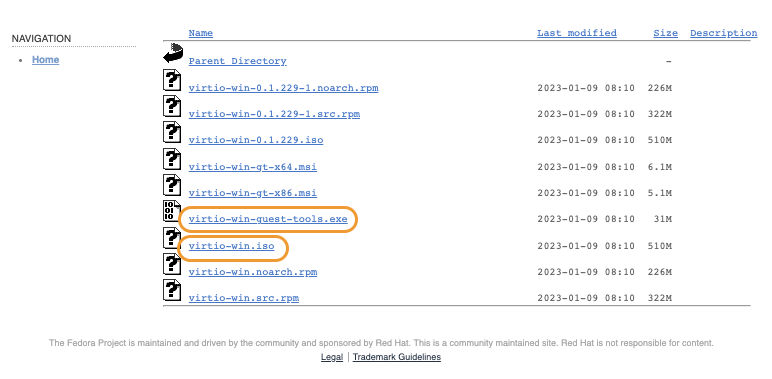
Go to following URL:
https://fedorapeople.org/groups/virt/virtio-win/direct-downloads/latest-virtio/
Download virtio-win.iso and virtio-win-guest-tools.exe.
| File | Direct Link | Usage |
|---|---|---|
virtio-win.iso | link | Required during installation. Provide network and storage drivers. |
virtio-win-guest-tools.exe | link | Required after installation. Provide dynamic screen resizing for remote connection. |
Setup KVM
Prepare ISO
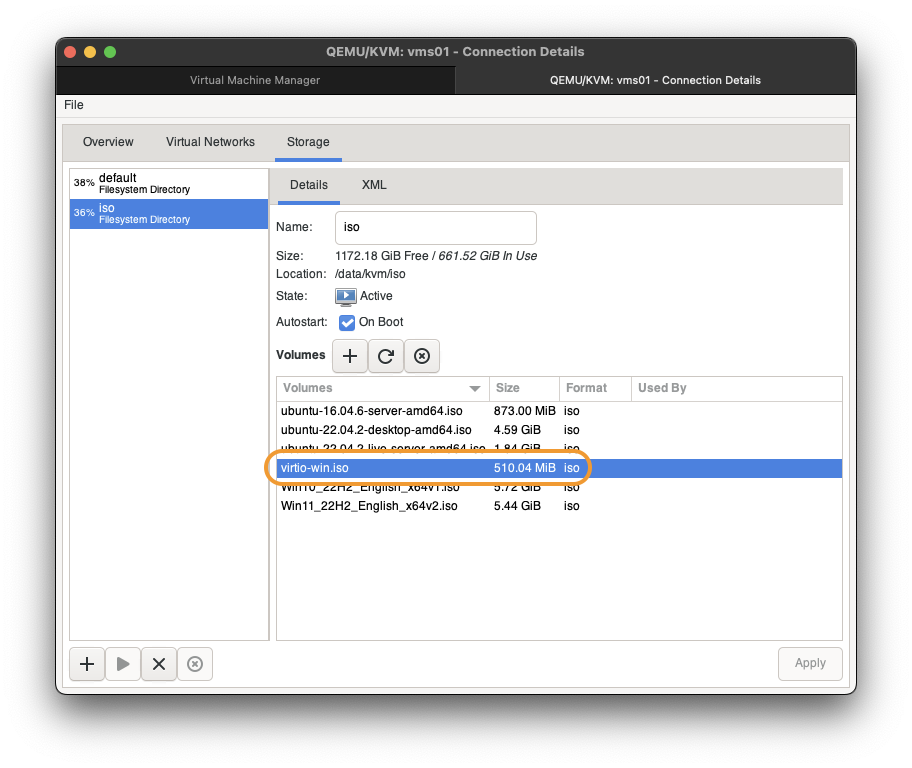
On KVM host, put both Windows iso and virtio-win.iso into KVM storage pool. The default location is /var/lib/libvirt/images/.
If done correctly, they should show up in KVM storage pool like following.
Create VM
Start KVM creation.
Choose local media. Then
Forward.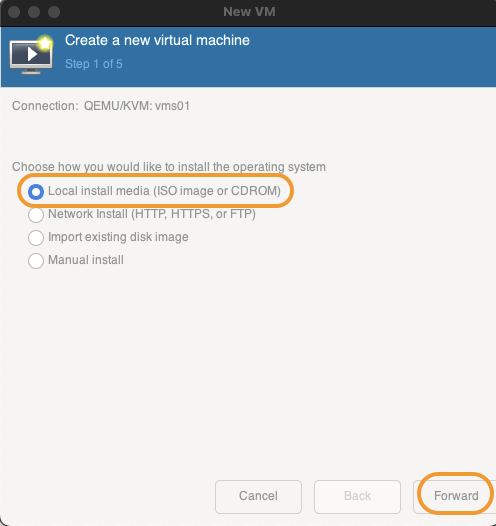
Select Windows ISO either by drop down or
Browse....
If operating system was not detect automatically, typeMicrosoftin the box and you should be presented with a pop up menu. ChooseMicrosoft Windows 11.
ThenForward.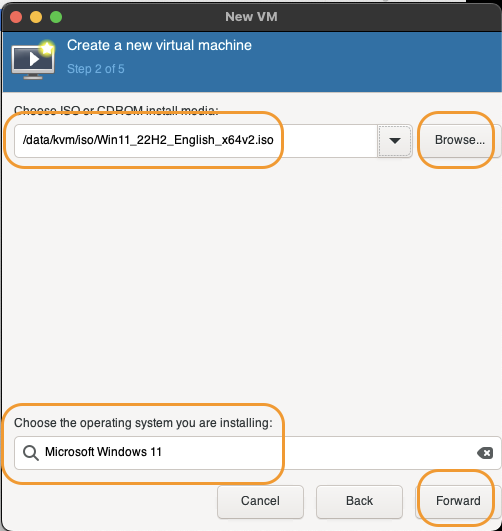
Set memory size. Then
Forward.CPUwill be override in customization steps.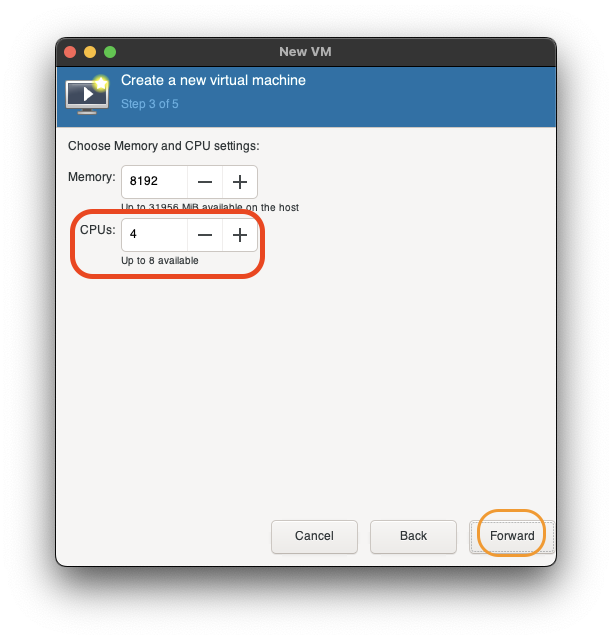
Set disk size. Then
Forward.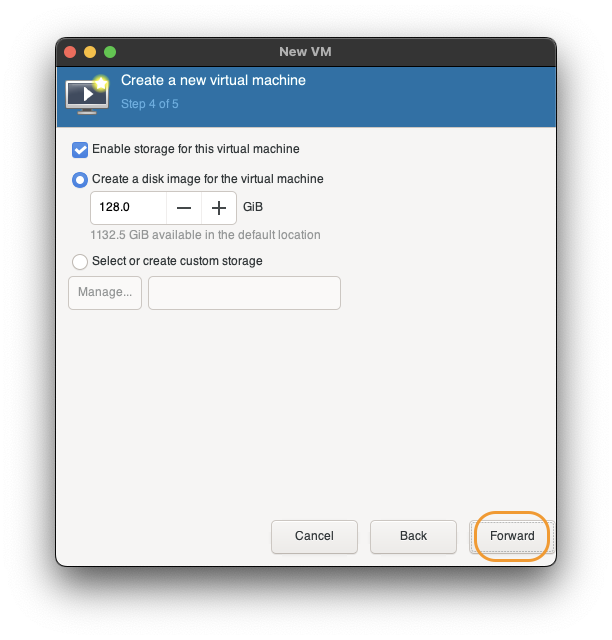
Set name of new VM.
CheckmarkCustomize configuration before install.
ThenFinish.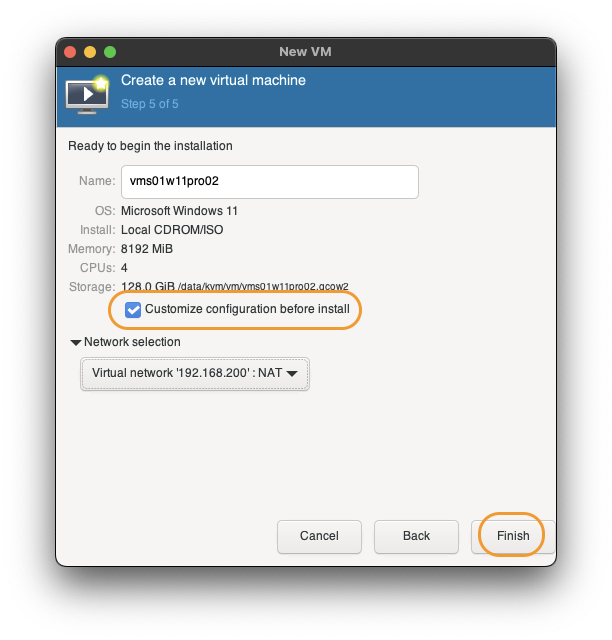


Customization screen will pop up. Continue to next section.
Customize VM
We will set VM to use VirtIO, TPM.
In
OverviewChipsetshould beQ35Firmwareshould beUEFI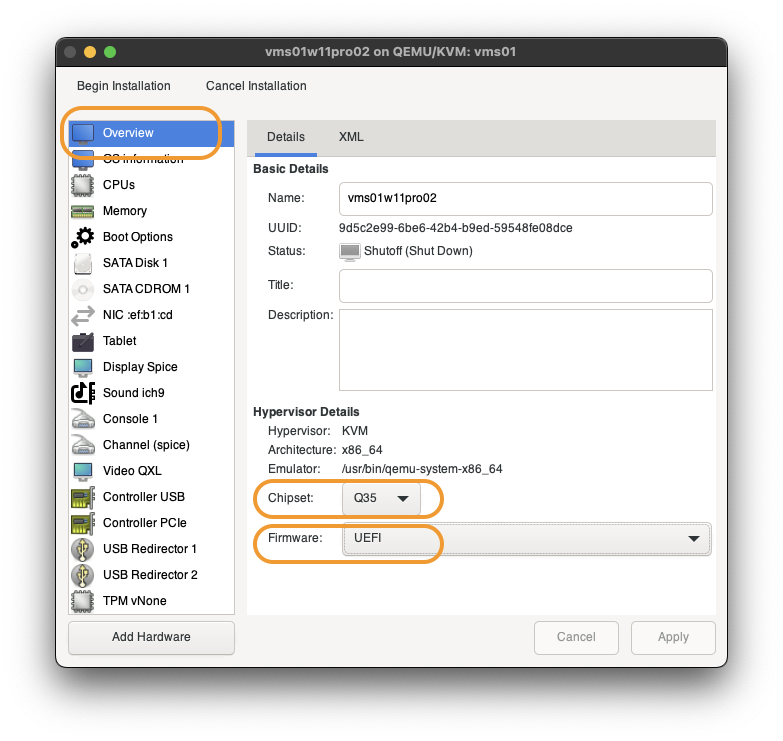
In
CPUs(IMPORTANT)
Windows Home only use 1 CPU socket, Windows Pro only use 2 CPU sockets. IfvCPUis used to assign more cpu, Windows VM will only use 1(home) or 2(pro) CPUs and become extremely slow. We have to useTopologyinstead.
CheckmarkManually set CPU topology.
SetSocketsto 1. SetCoresto your desire value.
ThenApply.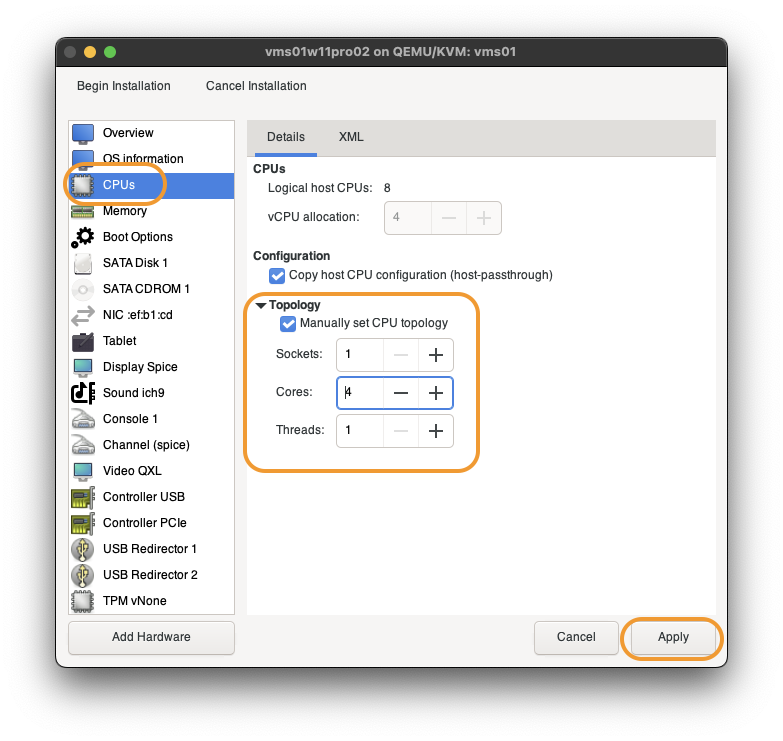
In
SATA Disk 1, changeDisk BustoVirtIO. ThenApply.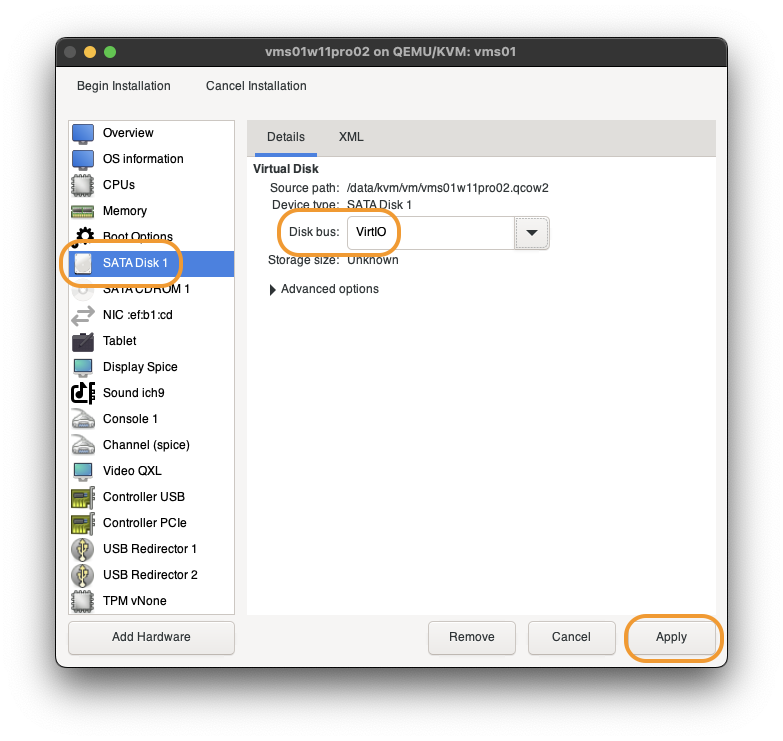
In
NIC ..., changeDevice modeltovirtio. ThenApply.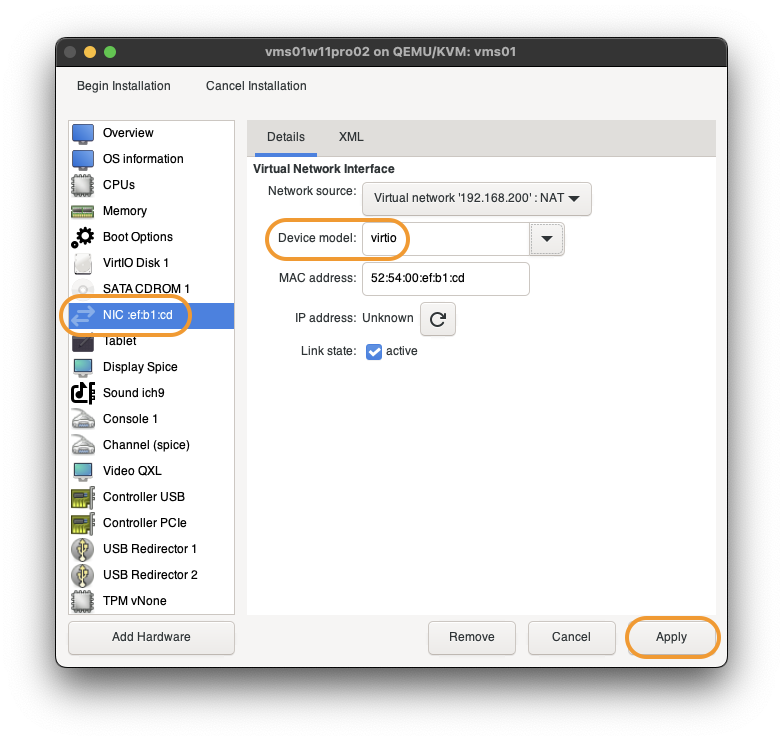
In
TPM vNone,
SetModeltoTIS.
SetVersionto2.0.
ThenApply.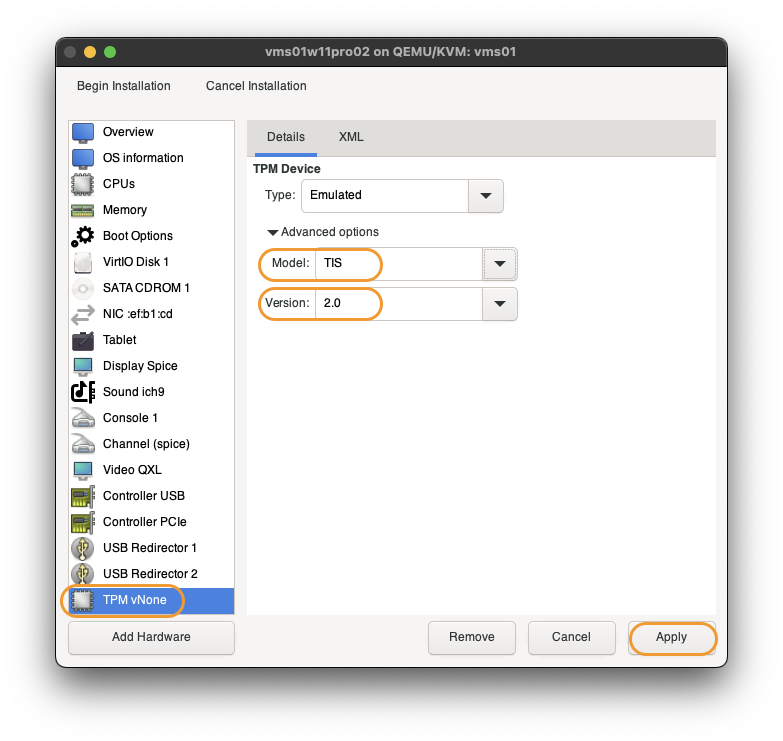
Click
Add Hardwareto open add hardware pop up.
InStorage:
ClickSelect or create custom storage
ClickManageand assignvirtio-win.iso.
SetDevice typetoCDROM device.
ThenFinish.
This allow us to add storage and network drivers during Windows installation.
Click
Boot Options.
CheckmarkSATA CSROM 1and move it to the top.
ThenApply.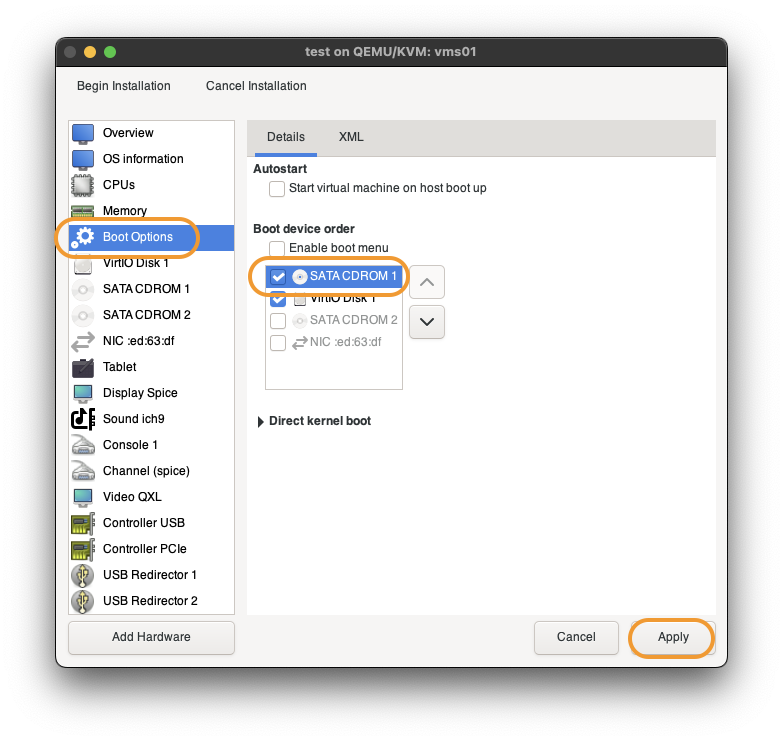
Click
Begin Installationto start Windows installation.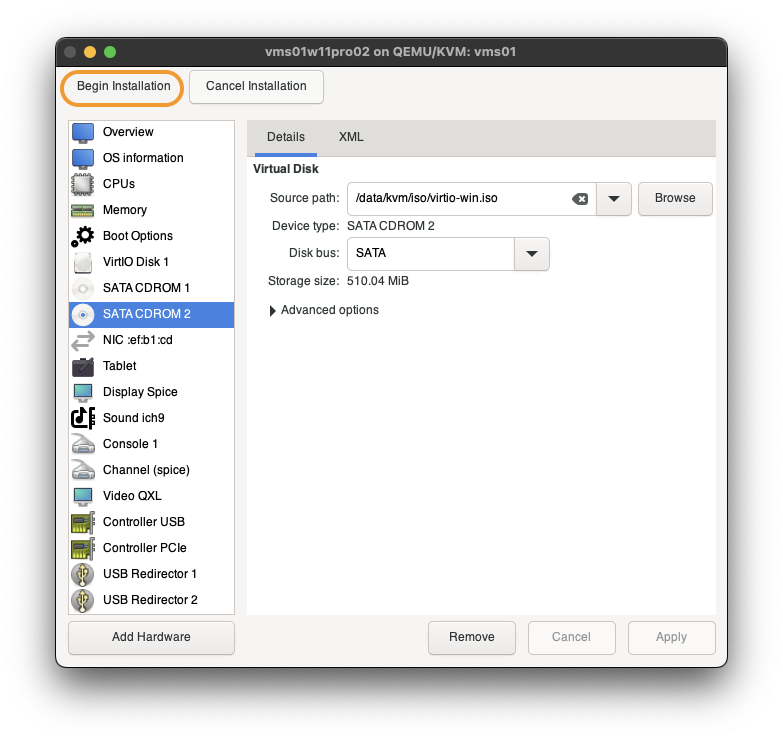


Windows Installation
We will not go through every single screen for Windows 11 setup, but only a few points:
Press A Key
When VM start, you have to press a key to boot CD(ISO). Else it will enter EFI prompt and you have to restart the VM again. You only have a few seconds to do it.
Loading Drivers
When we reach the disk screen, it will be empty. We will be loading both the storage driver and network driver.
Click
Load driver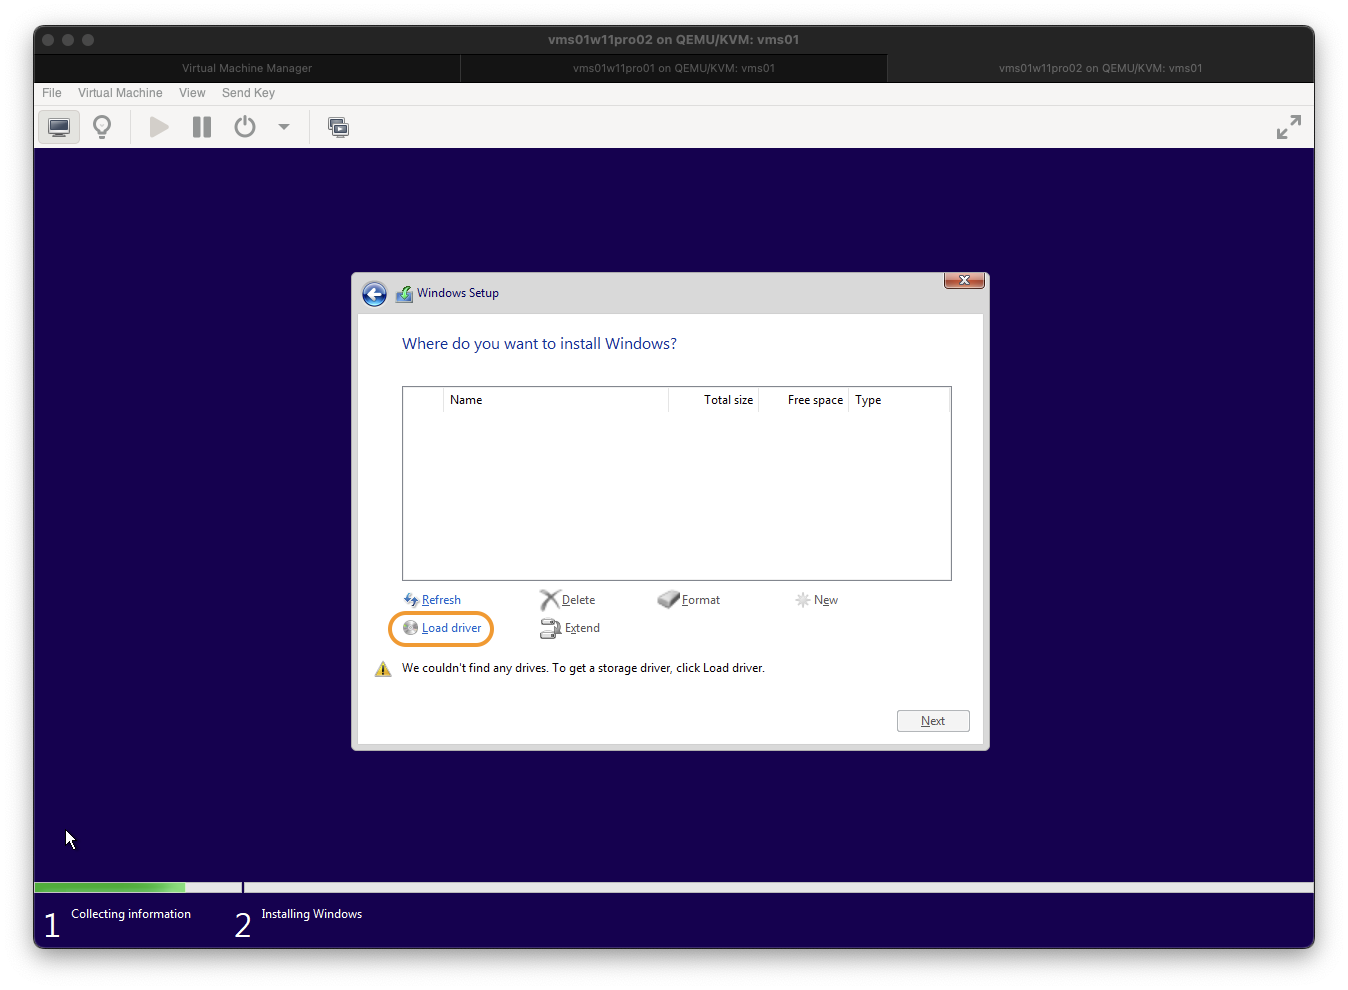
Click
OK.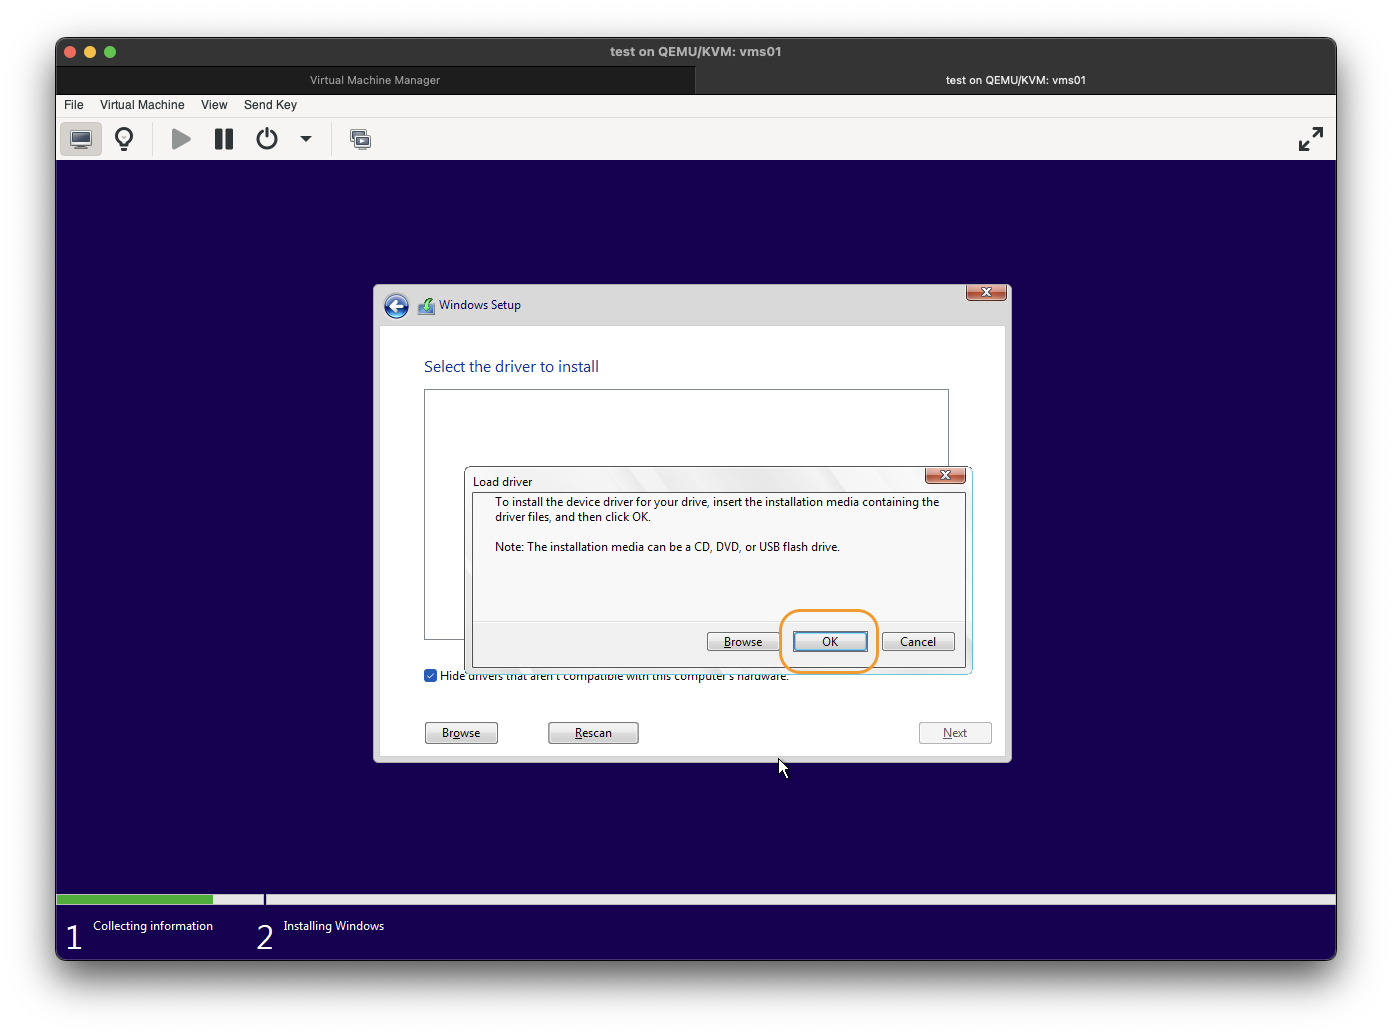
Select
Red Hat VirtIO SCSI controllerwithw11in the path.
ThenNext.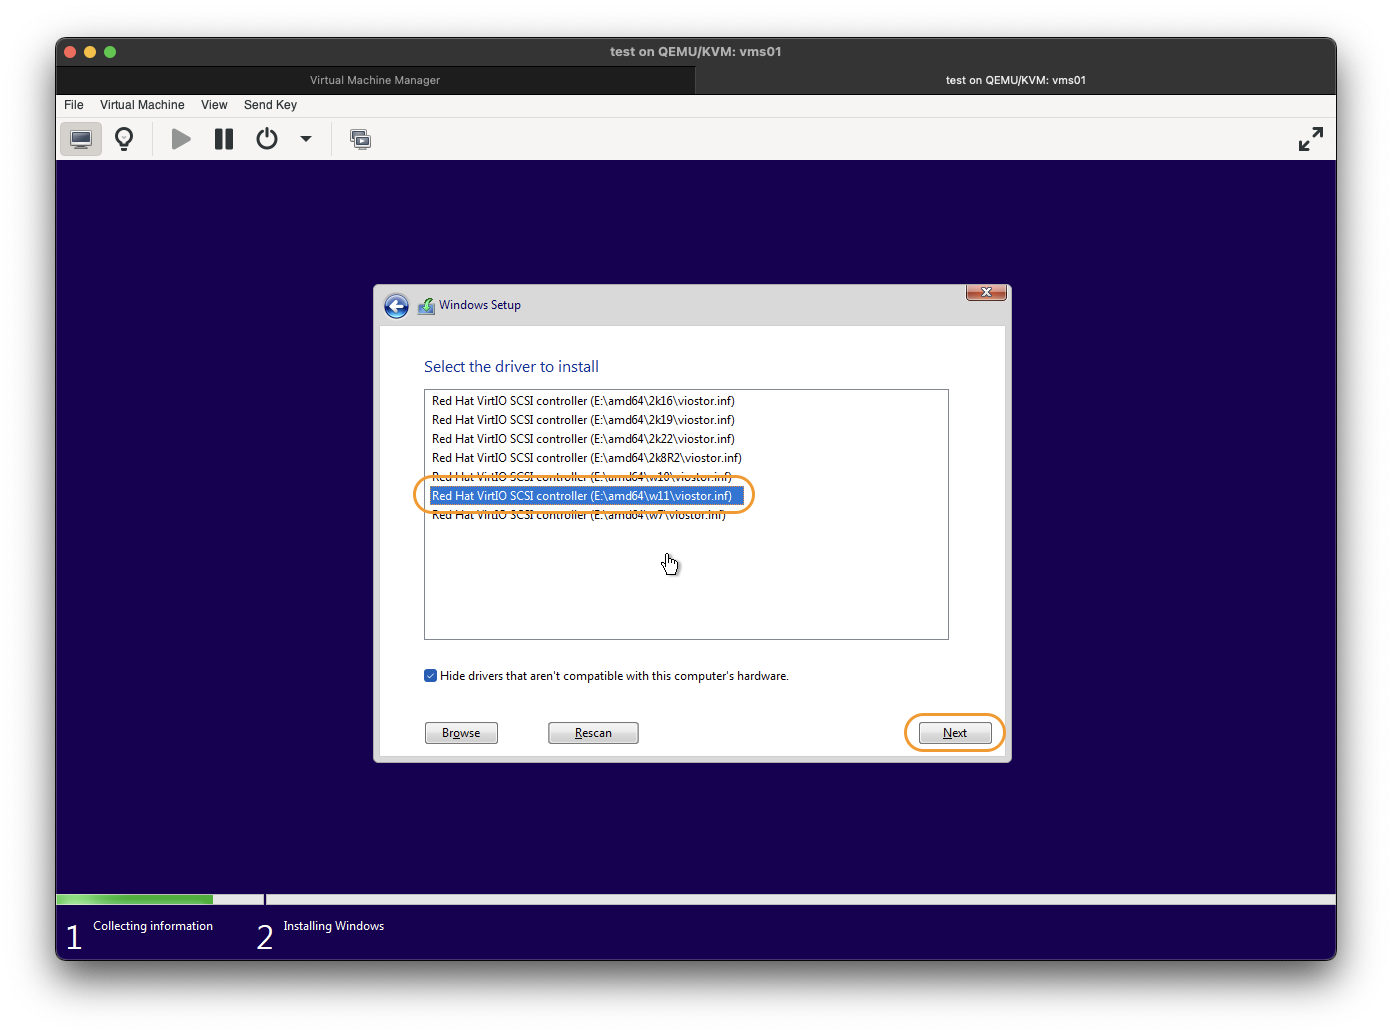


The above not only load the VirtIO SCSI driver, but also the network driver.
Finish the installation process and boot into Windows. Do not remote the virtio-win ISO yet. We still need it in next phase.
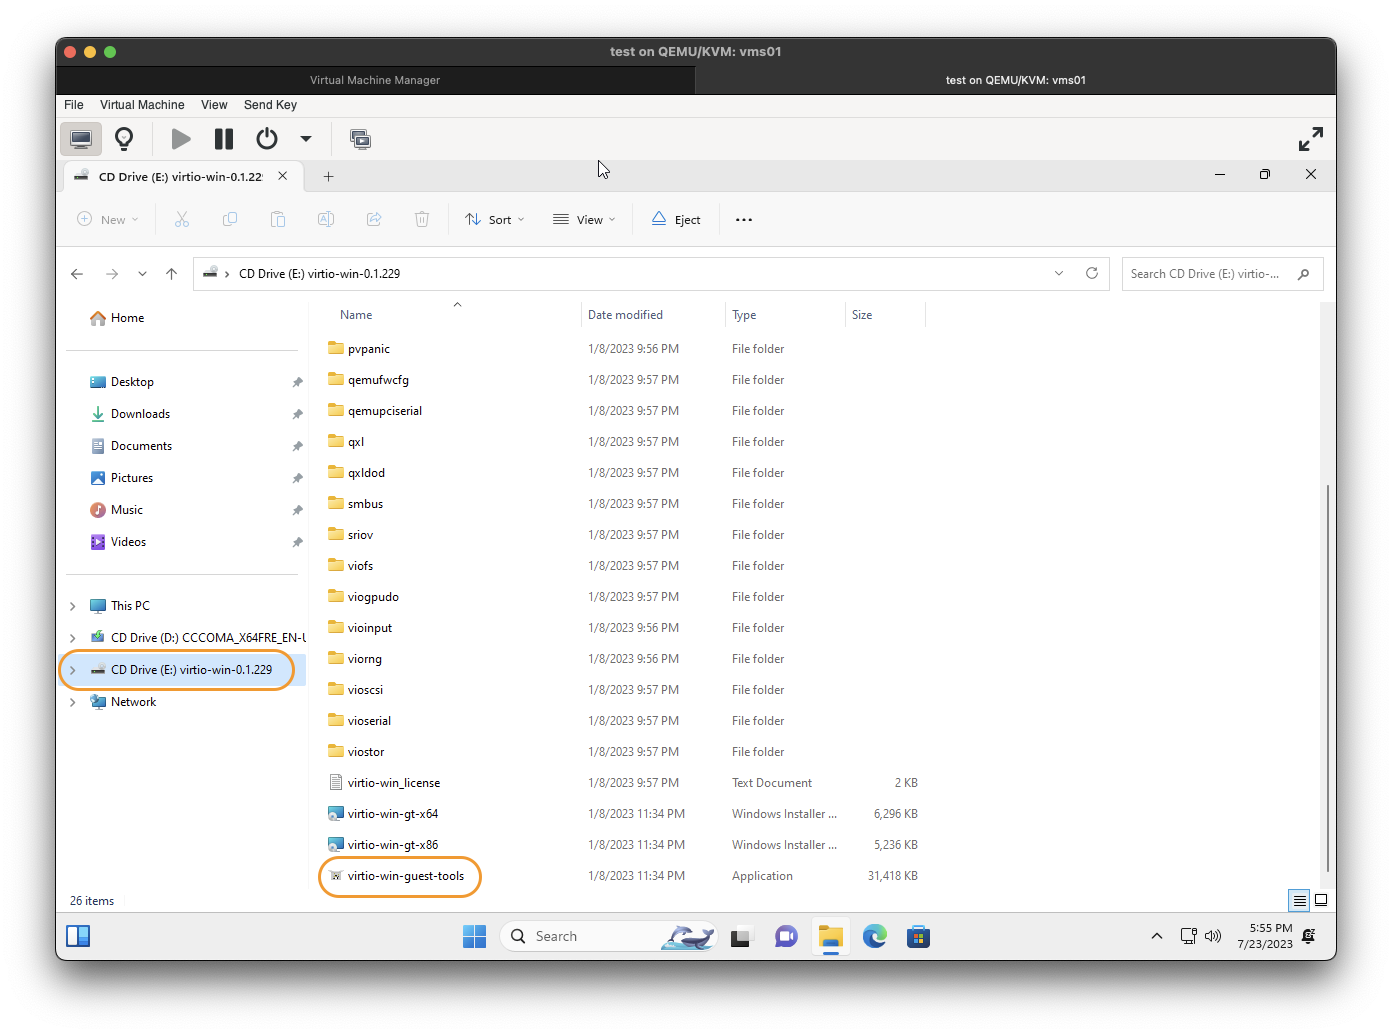
VirtIO Guest Tool
After Windows installation and initial setup, go CDROM drive with wirtio-win, run virtio-win-guest-tools.exe. That will install all remaining drivers and most importantly, the display driver allow for remote resizing.
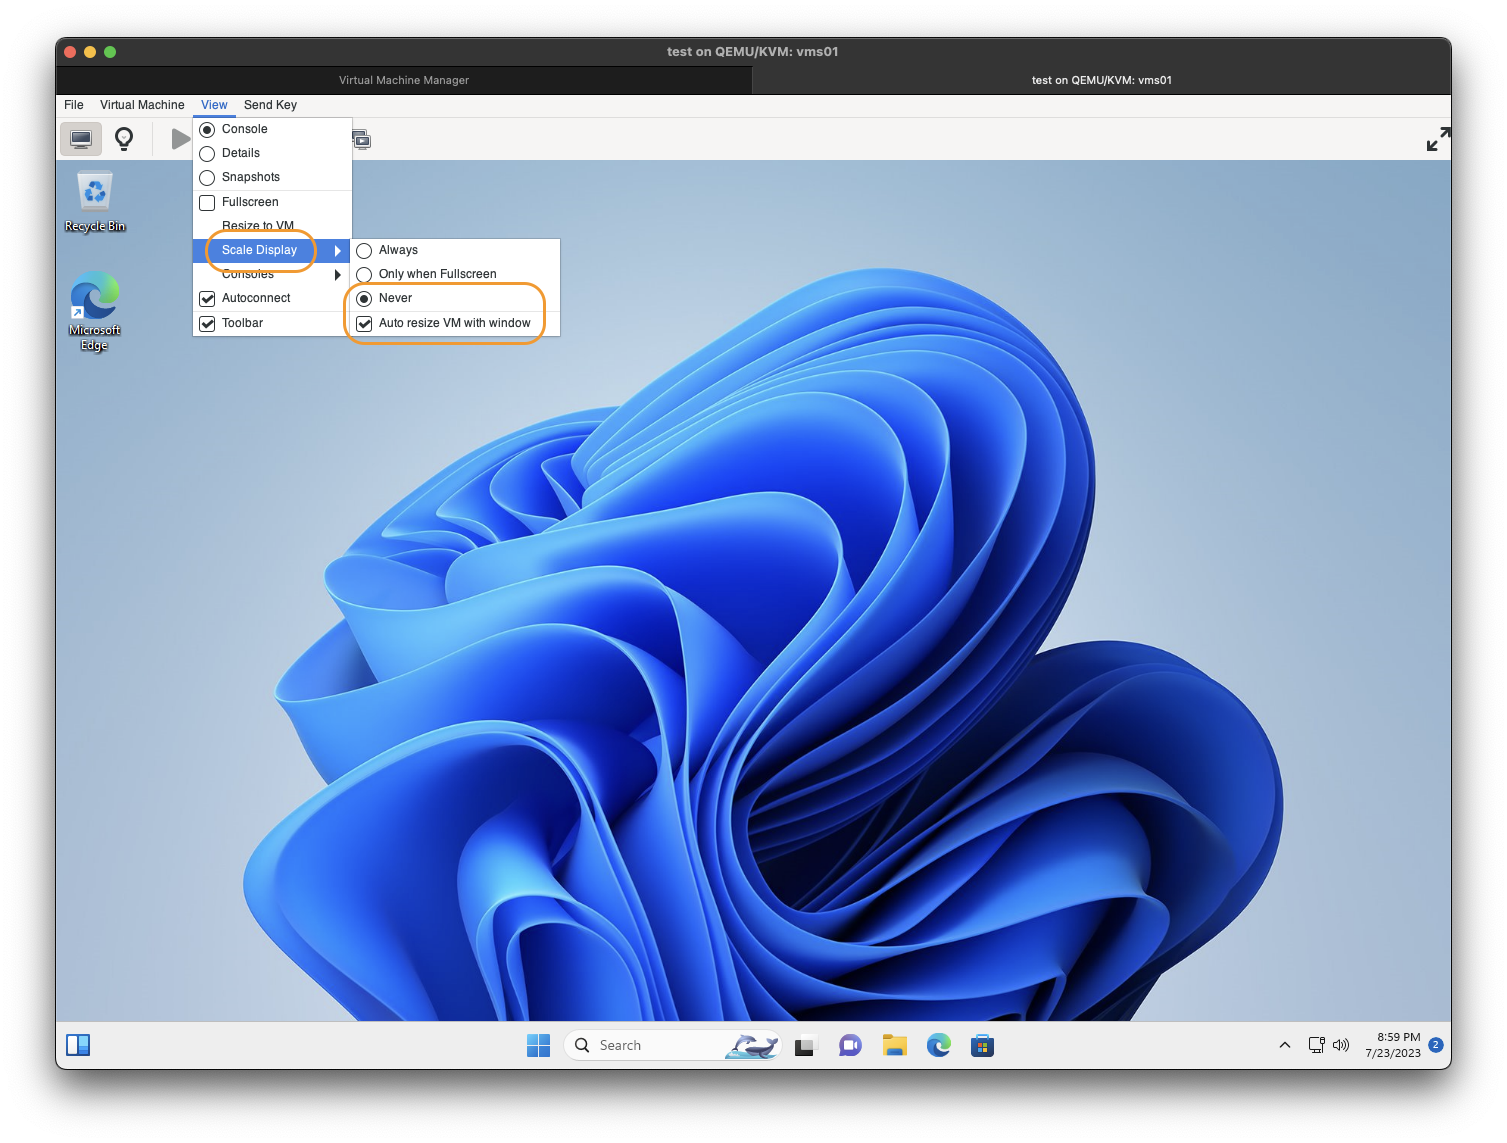
Turn on auto resize in virt-manager.